There is a fabulous linky party with prizes going on over at Scrapbook Blessings Club. I am entering
my calendar that I made this month for the Besties Dutch Girl challenge. It went live a week ago, so I hope this is okay to enter.
I am using a Lil Lovely by Sherri Baldy My-Besties. Isn't she adorable? My calendar that I used can
be found online by typing in free calendar pages 2015
For the base of my calendar I am using coasters that we found at a garage sale. I just papered them up all pretty. :)
Be sure to come enter your project today at Scrapbook blessings club to be entered to win!
http://www.scrapbookblessingsclub.com/2014/12/december-linky-party-anything-goes.html
Wednesday, December 31, 2014
Monday, December 22, 2014
Brown and yellow card using a My-Besties digi stamp
It's a beautiful day today! Actually, it is quite cold here in Michigan, but no snow on the ground
thankfully. :)
I've decided to make my mom a birthday card with colors that I never use, but really love. Brown
and yellow. They look awesome together, if I don't say so myself. :)
I'm using a digi stamp today by Sherri Baldy My-Besties. Isn't she darling? I love the big eyes, the
long lashes, the long flowing hair. Each of her images just puts a smile on my face and they do for
my mom each time she receives a card also.
THanks for taking a peak! If you would like to search through Sherri Baldy's Besties...come on over to www.scrapbookstampsociety.com
Thursday, December 18, 2014
Scan N Cut and My Besties
Today I am sharing a card with a My-Besties image called Christmas Dolly. You can find it at Scrapbook stamp Society. http://scrapbookstampsociety.com/auction_details.php?name=Christmas-dog-Dolly-MyBesties-Pets-by-Sherri-Baldy&auction_id=107559 I have shared how I cut this on yesterday's post.
For today I am sharing how to do the snowflakes, the words, and the big white box on the bottom that has the words in it. These are all patterns that come in your machine.
To use a bulit in pattern that your machine comes with ..
1. Load mat
2. Click Pattern
3. For the Snowflake I clicked on the first icon of the plant and flower, then clicked on the
first snowflake in the set.
4. Choose a size that you would like for your snowflake. I chose the smallest size which ended
up being 1.36 Height, and 1.19 in width. You can choose any size you like. Click ok
5. click ok on the next screen
6. on the next screen you can say how many you would like. I needed 6, you can plus or minus
on this screen, and then click Set
7. on the next screen you can move your snowflake around on the mat where you would like to
cut it just by clicking on it with your finger and moving it, or just leave it where it is, and click
OK
8. Click Cut, and Start
9. Your image should have cut out perfectly and now you can unload your mat.
Monday, December 15, 2014
Scan N Cut Digi stamp with an offset outline
Hi Folks
Still learning my Scan N Cut and documenting what I am doing along the way.
Today I am sharing how I am using a digi stamp and then using the Brother Scan N Cut to cut an
outline around my image.
I have a digi stamp on plain card stock orinted out and ran it through the machine. For this..
1. Load mat (button on the top right of machin)
2. I push scan (there are only two choices pattern or scan)
3. I push direct cut (you have 3 choices that pop onto the screen)
4. The machine scans the image on the mat and shows you what it found. click ok
5. Select your cutting area. There are arrows on the screen that you can move. (this of this
as cropping your image that is on the paper)
6. Here you have a choice to cut on the line by clicking ok, or you can click the top circles and do
an offset around the image or the bottom images to do a pattern around them. I am going to do the outline around my images so I am pushing the top 2 circles.
7. By Clicking on the circles it will take you to the next screen. Click on the plus button until you have the width of offset that you would like. I would like my outline to be 0.04 you can play around with that depending on how much you would like. Click ok
8. this brings you back to the last screen click ok again
9. This screen will say Draw or Cut.. Click cut , and when prompted click Start
Here is an example of a digi stamp with a cut line around the image instead of on the line. I love how they turned out.
 |
| You can find both of these images at www.scrapbookstampsociety.com |
Wednesday, December 10, 2014
Scan n Cut Amazing! How to do a stamped image with Scan N Cut
Okay, so I haven't posted in awhile.. reason being is because I got a brand new Scan N Cut machine as a gift from a very dear friend.
I have been trying to learn all I can about this machine and how it works. So far it's pretty amazing!
I have stamped an image on plain card stock and ran it through the machine. For this..
1. Load mat (button on the top right of machin)
2. I push scan (there are only two choices pattern or scan)
3. I push direct cut (you have 3 choices that pop onto the screen)
4. The machine scans the image on the mat and shows you what it found. click ok
5. Select your cutting area. There are arrows on the screen that you can move. (this of this
as cropping your image that is on the paper)
6. Here you have a choice to cut on the line by clicking ok, or you can click the top circles and do
an offset around the image. You could also click the little patterns to make a selected shape around your image instead. I'm going to cut on the line, so I just click ok
7. The next screen asks you if you would like to draw, or cut? I click cut and then push the start button when prompted.
8. Your machine will feed your mat to the proper location and cut your design. YAY!
Here is an example of a stamped image cut this way. Sorry I didn't take a good photo, but these
are just samples.
Thursday, December 4, 2014
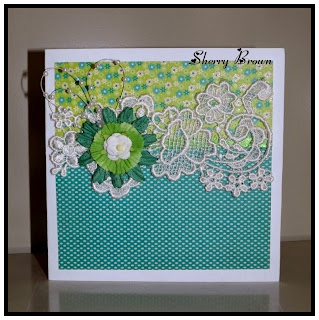
Happy 21st Birthday!
Today is my son's fiance's birthday and she turned 21! So...a big happy birthday to you Kristen!
I've used some patterned papers that have been sitting in my craft room forever, along with some
beautiful lace. Kristen loves lace, so I knew I had to add some on her card.
I've used a My-Besties digi stamp called img452 and you can find it at:


Subscribe to:
Comments (Atom)


